This tutorial is submitted by Standard Library
A measurable fitness goal and a tracking tool will keep you accountable, motivated, and help you push your limits at the gym. Perhaps your fitness goal is to be stronger; you’ll need to have a workout plan and gradually increase the number of sets, repetitions, and weight for each exercise. Your workout plan is up to you. In this tutorial, I’ll show you how to set up convenient tools to plan your workouts, track, and log your progress.
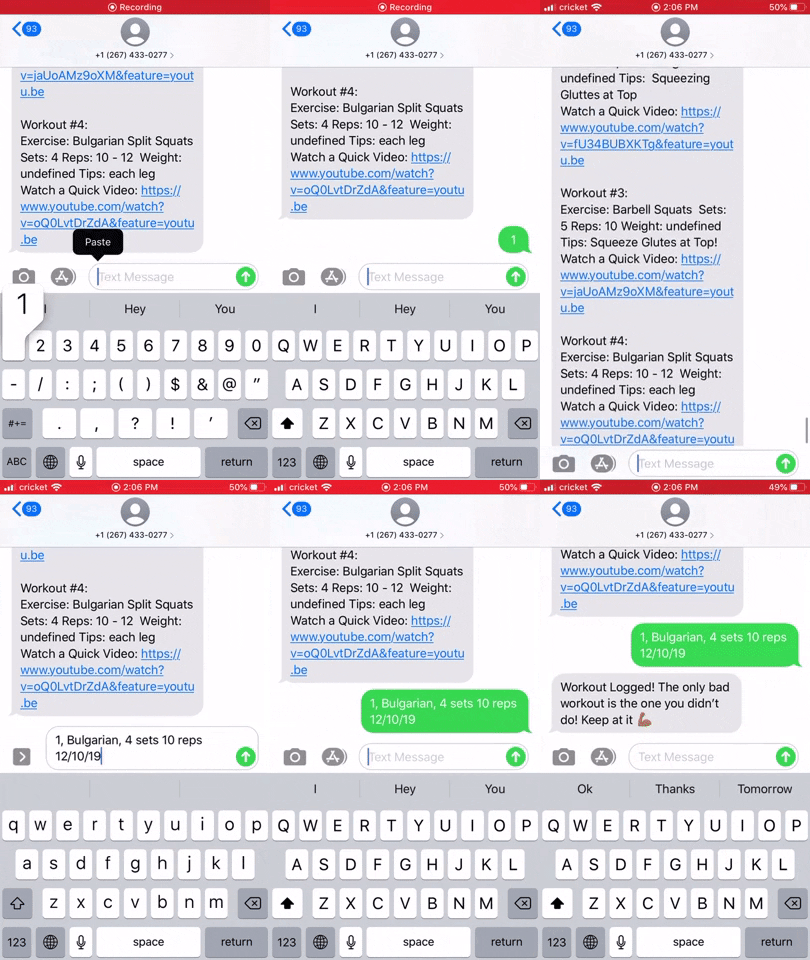


I struggled with planning my workouts and tracking my progress. For a while, I tried using a small notebook, but I wasn’t consistent about carrying it or logging my workouts. I tried setting up a Google spreadsheet, but disliked scrolling through the sheet and expanding the cells on my phone to input notes. So I came up with a simple solution with Airtable and Twilio APIs on Standard Library.
The Solution
I set up an Airtable base with a workout plan and connected my base to a Twilio number. Now, I can retrieve my workouts and log my sets, reps, weight, and date for each exercise — all via simple SMS😉
Now let me show you how to build your fitness planner + tracker!
What You’ll Need Beforehand
- 1x Airtable free account — Airtable is a combination of a spreadsheet & database.
- 1x Twilio account — Twilio allows us to programmatically make and receive phone calls, send and receive text messages, and perform other communication functions via APIs.
- 1x Standard Library free account — A platform for building and deploying APIs, linking software tools, powering Slack apps, automating tasks, and more.
Step 1: Prepare your Airtable Base
To get set up faster, I’ll share my Airtable base for a 12-week workout plan. After you complete this tutorial, you can modify the fields and workouts to your liking. For now, I’d recommend you continue following along. Once you log in to Airtable, copy my Airtable base by clicking this link:
https://airtable.com/addBaseFromShare/shro85XYtmV0cU09V
I organized this Airtable by grouping Days in Field 1. For each day, I’ve planned out 5 to 6 exercises. I did this so that it’ll be easy for me to query the Airtable for exercises by texting the Day number. For example, if I’m on Day 1 of my challenge, I’ll text “1” to my Twilio number, and I will receive an SMS with Exercise, Sets, Repetitions, Tips, and Video for all rows that match Day 1.
I’ve also added a long text field titled Notes, where I will log notes after completing every exercise.
Now that you’ve copied my base, you’re ready to move on to the next step.
Step 2: Deploy the Workflow Code from Github
You can view the code that will connect your Airtable base and your Twilio number on GitHub here. To deploy your Airtable + Twilio workflow to Standard Library, click the “Deploy” button in the README of the repository. Alternatively, you can follow this link.
You will be prompted to sign up (or login) to Standard Library at this stage. Once signed in you’ll see a page like this:

The Events table describes the events that kick off your workflow and the API endpoints that respond to events. For this project notice how we have two events here. The first sms.received event on Twilio sets off the Airtable API that selects all rows in Airtable matching the number you requested and will return Airtable fields via Twilio’s API that sends a message.
The second sms.received event triggers anytime you text your Twilio number to log a workout. When your number receives a text as a string separated by commas (“day, exercise, notes”), it will interpret your text and run the Airtable API that allows you to update rows by querying a base.
Next, we’ll need to link our Airtable and Twilio accounts to a Standard Library Identity.

Step 3: Link your Airtable Account to an Identity
The next step is to link your Airtable account to an Identity Token. Standard Library provides Identity Tokens that securely store and manage credentials to third party APIs. Once you’ve linked your accounts to a Token, you’ll be able to listen for events, access your API’s resources to create workflows.
You’ll need to click the Link Resource button to the right of Airtable…

Input a name that you’ll associate with your Airtable account for future workflows you’ll create. I’d suggest inputting the email you used when signing up for Airtable. Next, follow the instructions to retrieve your Airtables API key.

Select the blue “Finish” button.
Find and Select the table titled “ 💪 Personal Gym App” and click “Finish”.

Congrats! You’re done linking Airtable. Next, you’ll want to click the “Link Resource” button to the right of Twilio…

Click “Link New Resource” to start the Twilio Connect flow. You’ll need to log into Twilio, or create an account if you don’t have one.
While Twilio offers a free account and a free Trial number, you’re required to upgrade to connect your Twilio number to third-party apps. When you upgrade, Twilio will request that you add your credit card and will top your balance at $20. Twilio will deduct $0.0075 for every message you send.

Once you’re logged in, you’ll be asked to pick a phone number to associate with your workflow:
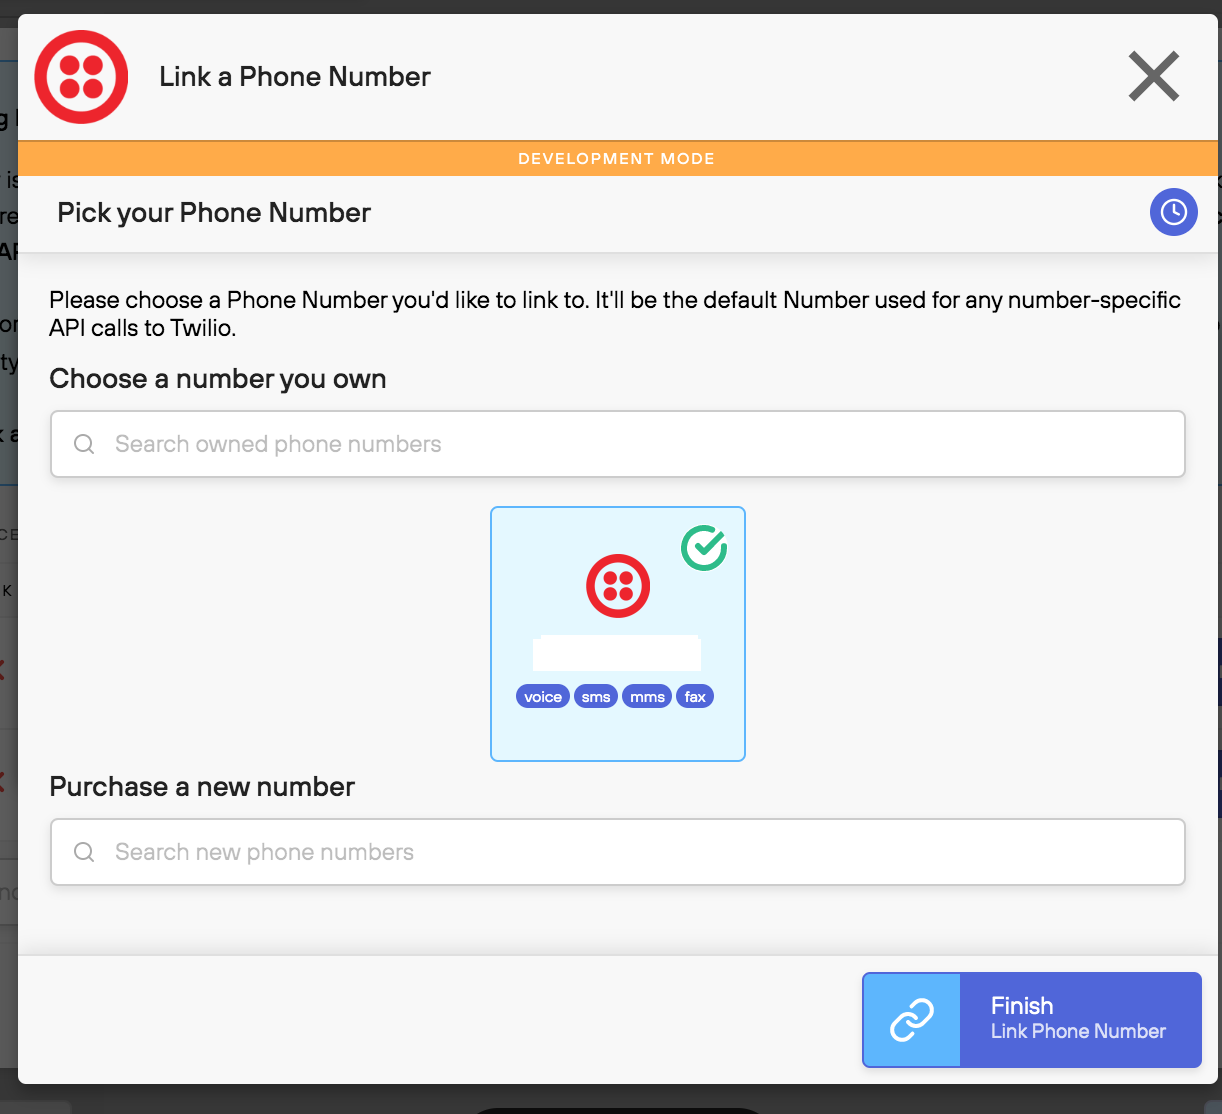
Note: If you already have a Twilio account and own a few numbers, they won’t appear under “Numbers you own.” When you authorized with the Standard Libary Twilio connect app, a new sub-account was created within your Twilio account. When you purchase a number from the above screen, it will be available on the sub-account, but not to your main account. You can read more about how Twilio Connect apps work here.
After you choose a number and click “Finish,” you’ll be brought back to the Identity Management screen:

And just like that, we’re done with the authentication process! We no longer have to spend hours reading over docs to figure out how to authenticate into each third-party API, Standard Library has stream-lined the process of building an intricate application that connects multiple API accounts. 🙌🏼
We can now click “Deploy Project” to ship the code that powers our fitness tracking app to Standard Library.
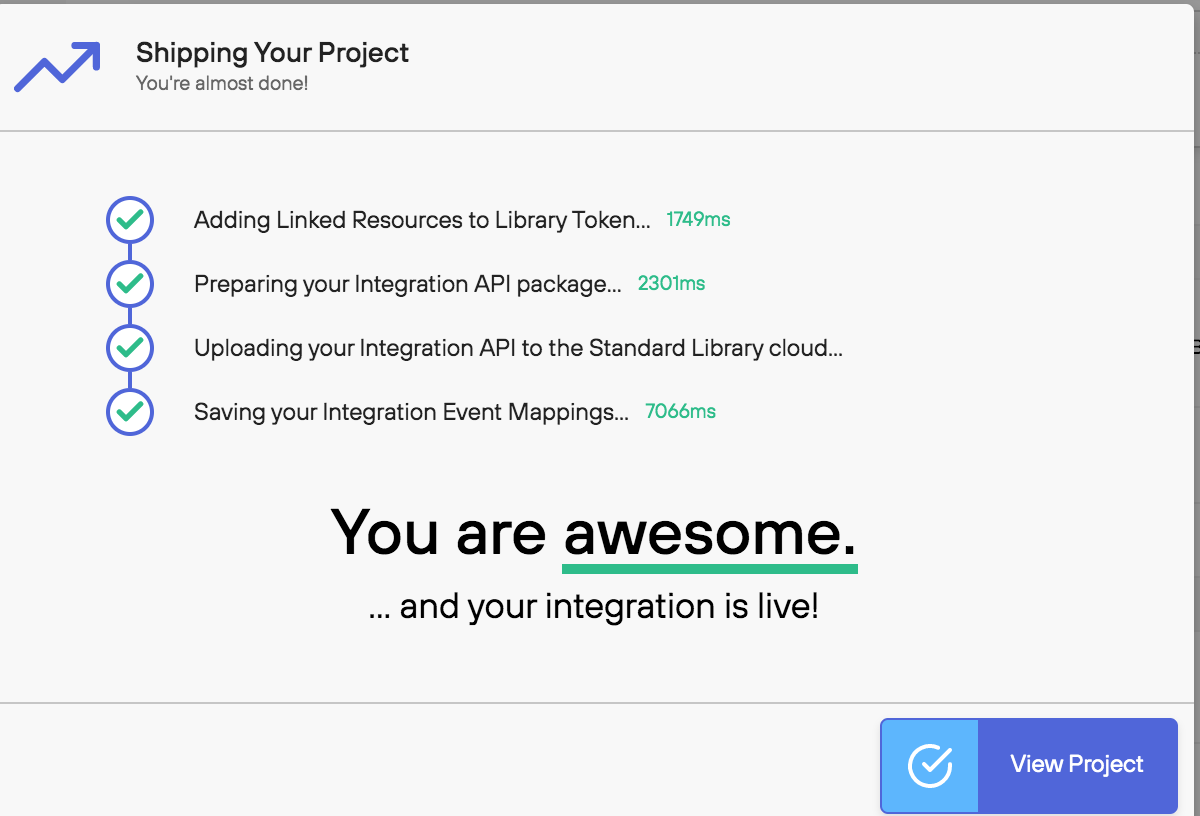
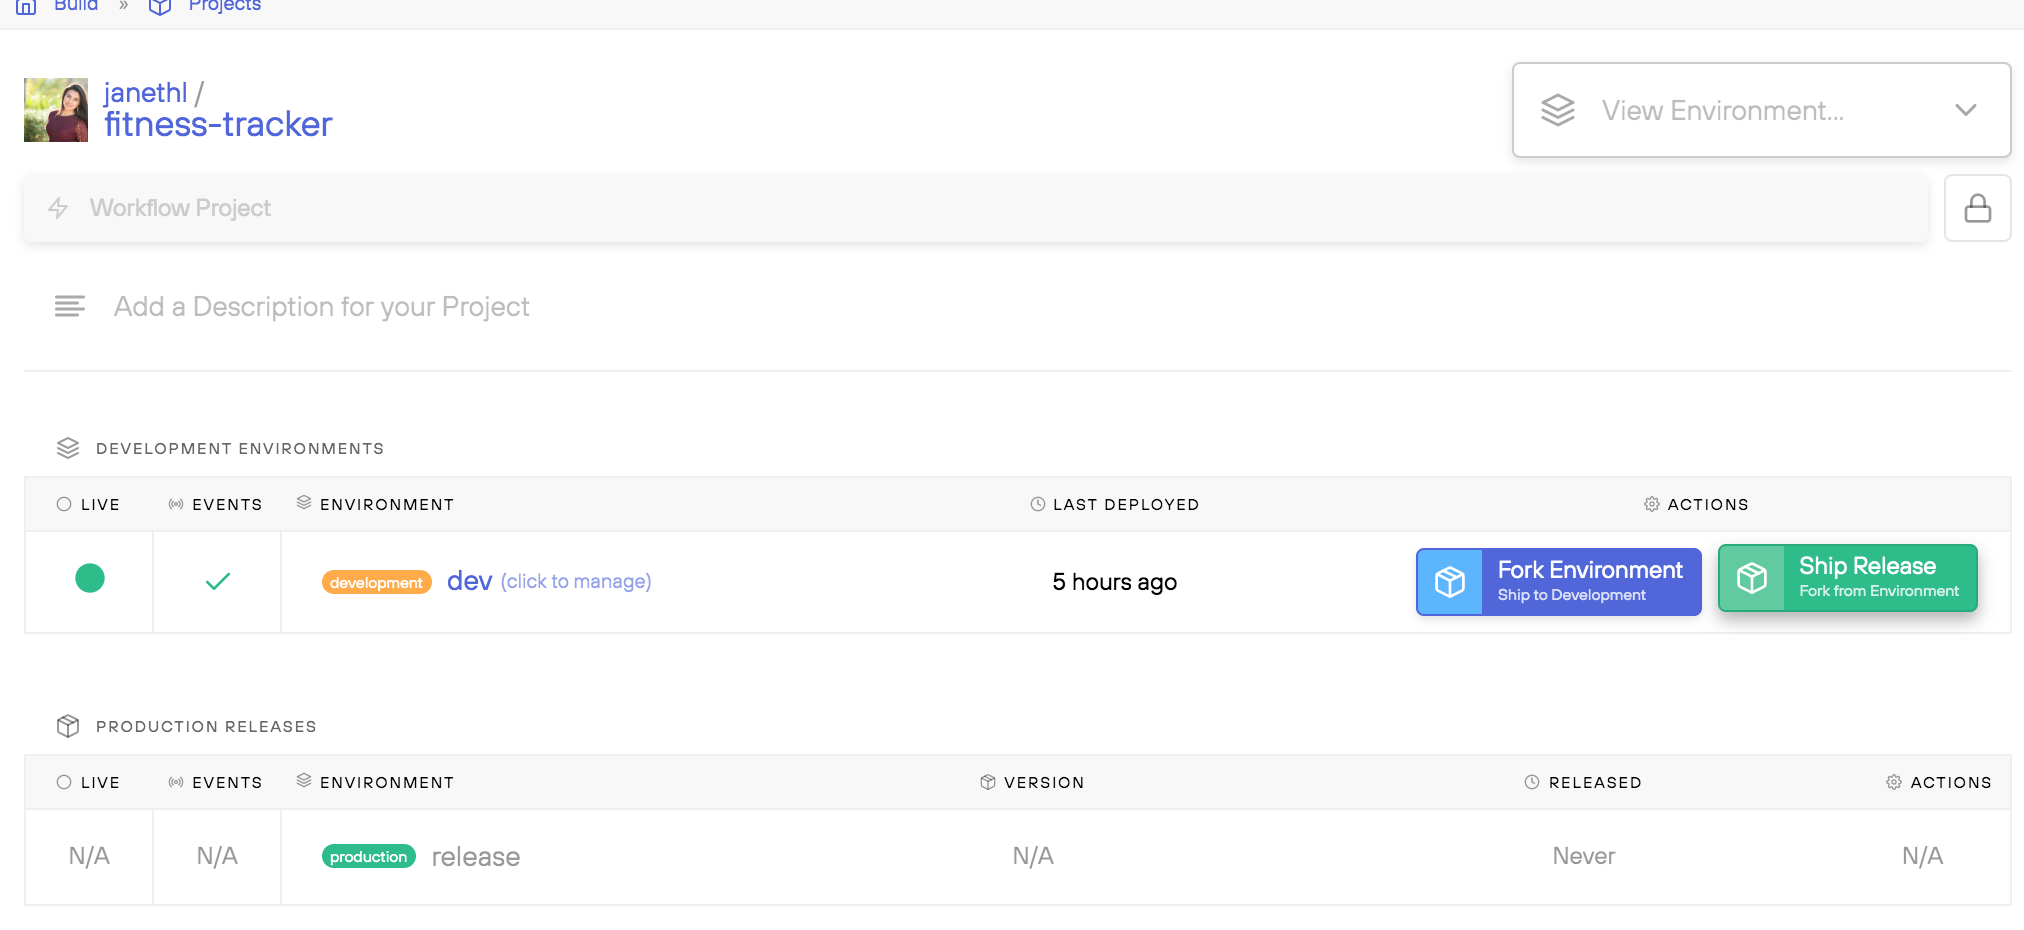
Step 4: Testing your Workflow
Test the first part of your workflow by texting your Twilio number “1”, If you set everything correctly, you will receive a text similar to this:
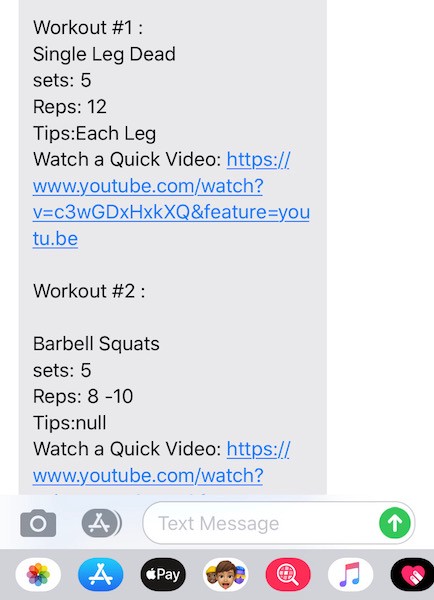
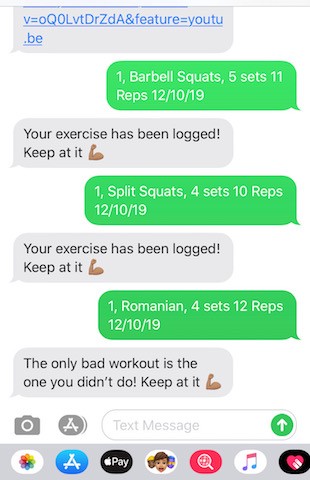
To log notes after completing every exercise, text back the day, exercise, and notes you’d like to log. For Example:
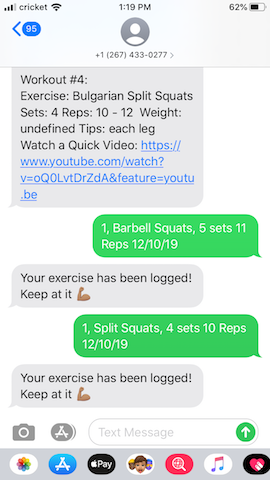
When you text back the day, exercise, notes, your notes should successfully log in to your airtable base:

Bonus: Modifying Fields in Airtable
🙌🏼 Congrats on successfully setting up your very own fitness tracking app! If you’d like to modify the fields in Airtable, you’ll need to add corresponding key-value pairs to your workflow’s code.
Let’s say you’d like to add a Weight field to your workout plan. First, add the field to Airtable as I’ve done:

Next, we’ll add an additional key-value for Weight to our code. Open up your Fitness Tracker project on https://code.stdlib.com/.
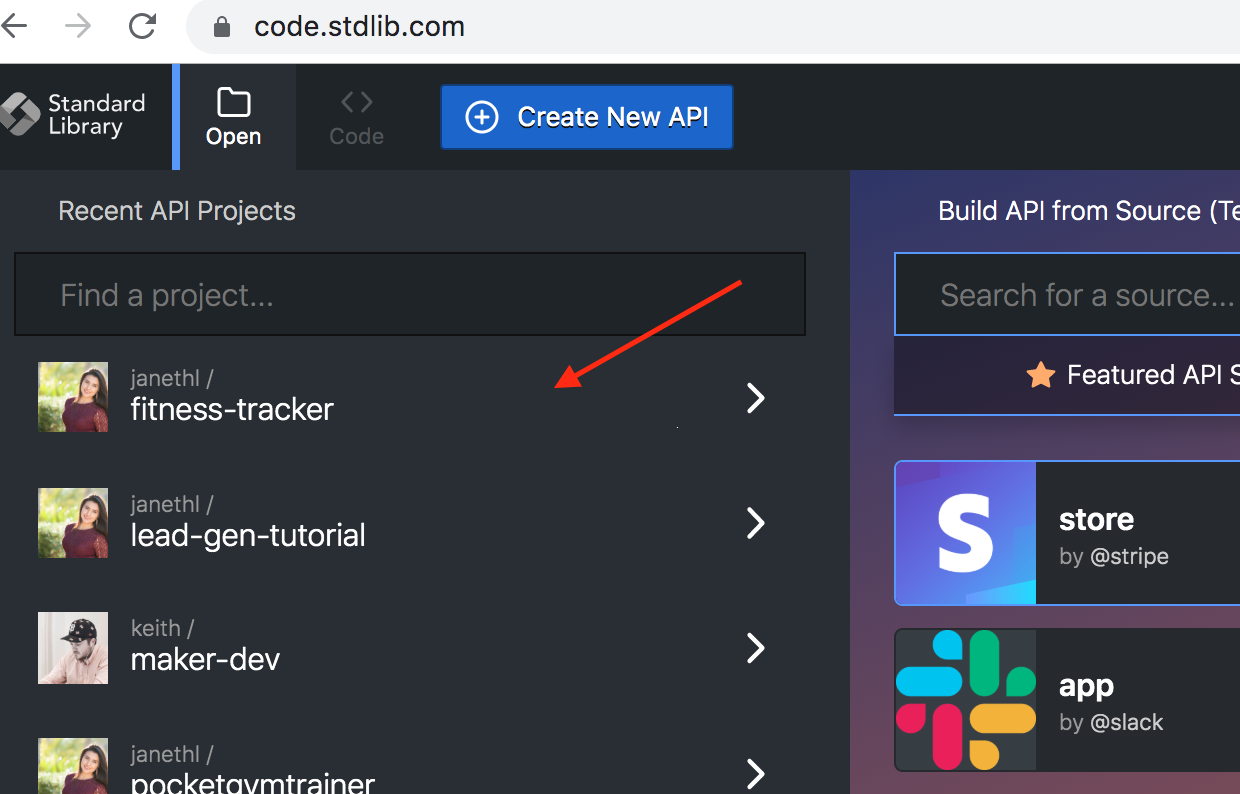
Open your recieved.js file underfunctions/events/twilio/sms folders. You should see the following code:
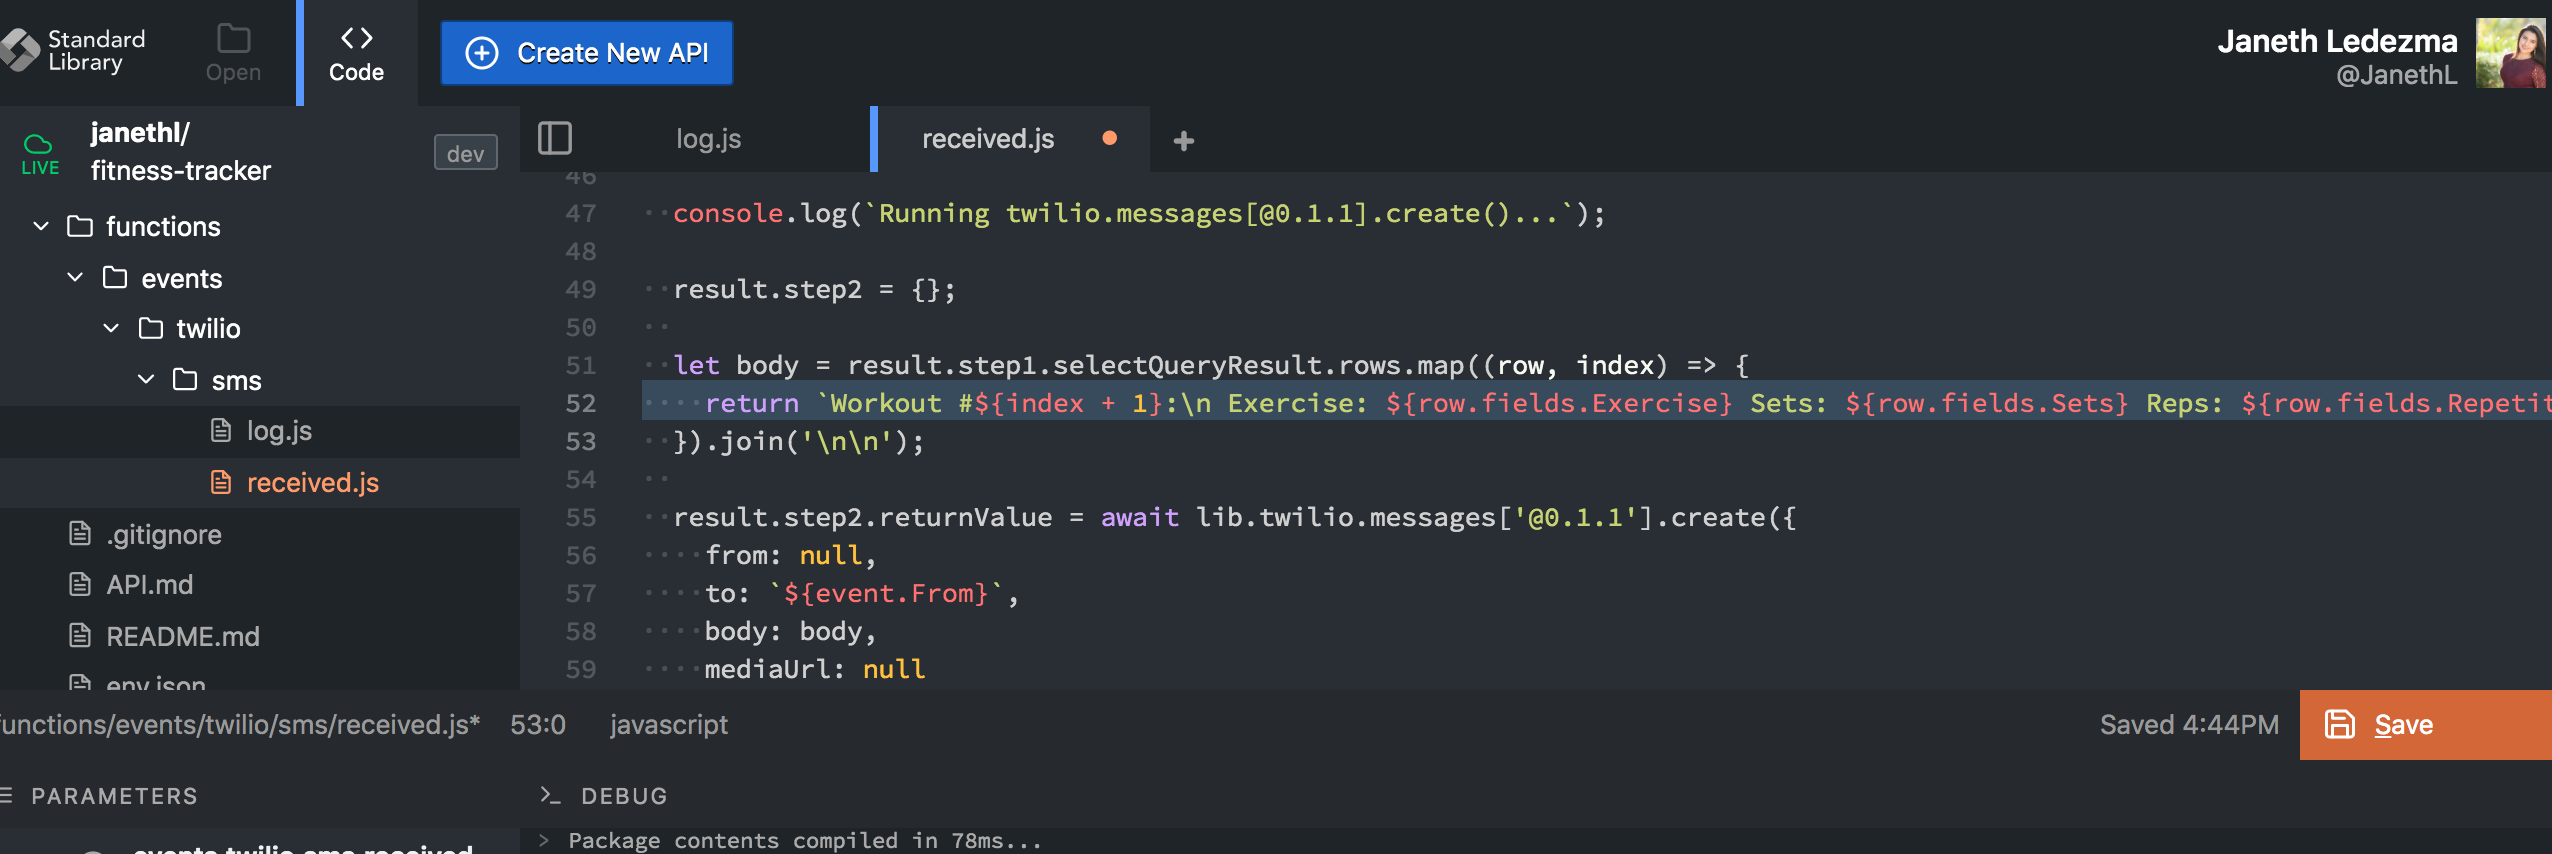
Find line 52 and add Weight: ${row.fields.Weight} inside the backticks as I’ve done for line 52:
return `Workout #${index + 1}:\nExercise: ${row.fields.Exercise} Sets: ${row.fields.Sets} Reps: ${row.fields.Repetitions} Weight: ${row.fields.Weight} Tips: ${row.fields.Tips}\nWatch a Quick Video: ${row.fields.Video}`
Hit the blue “Up” button to deploy your workflow. And you’re all set! Now when you text your Twilio number you will also retrieve the Weight field from your planner.
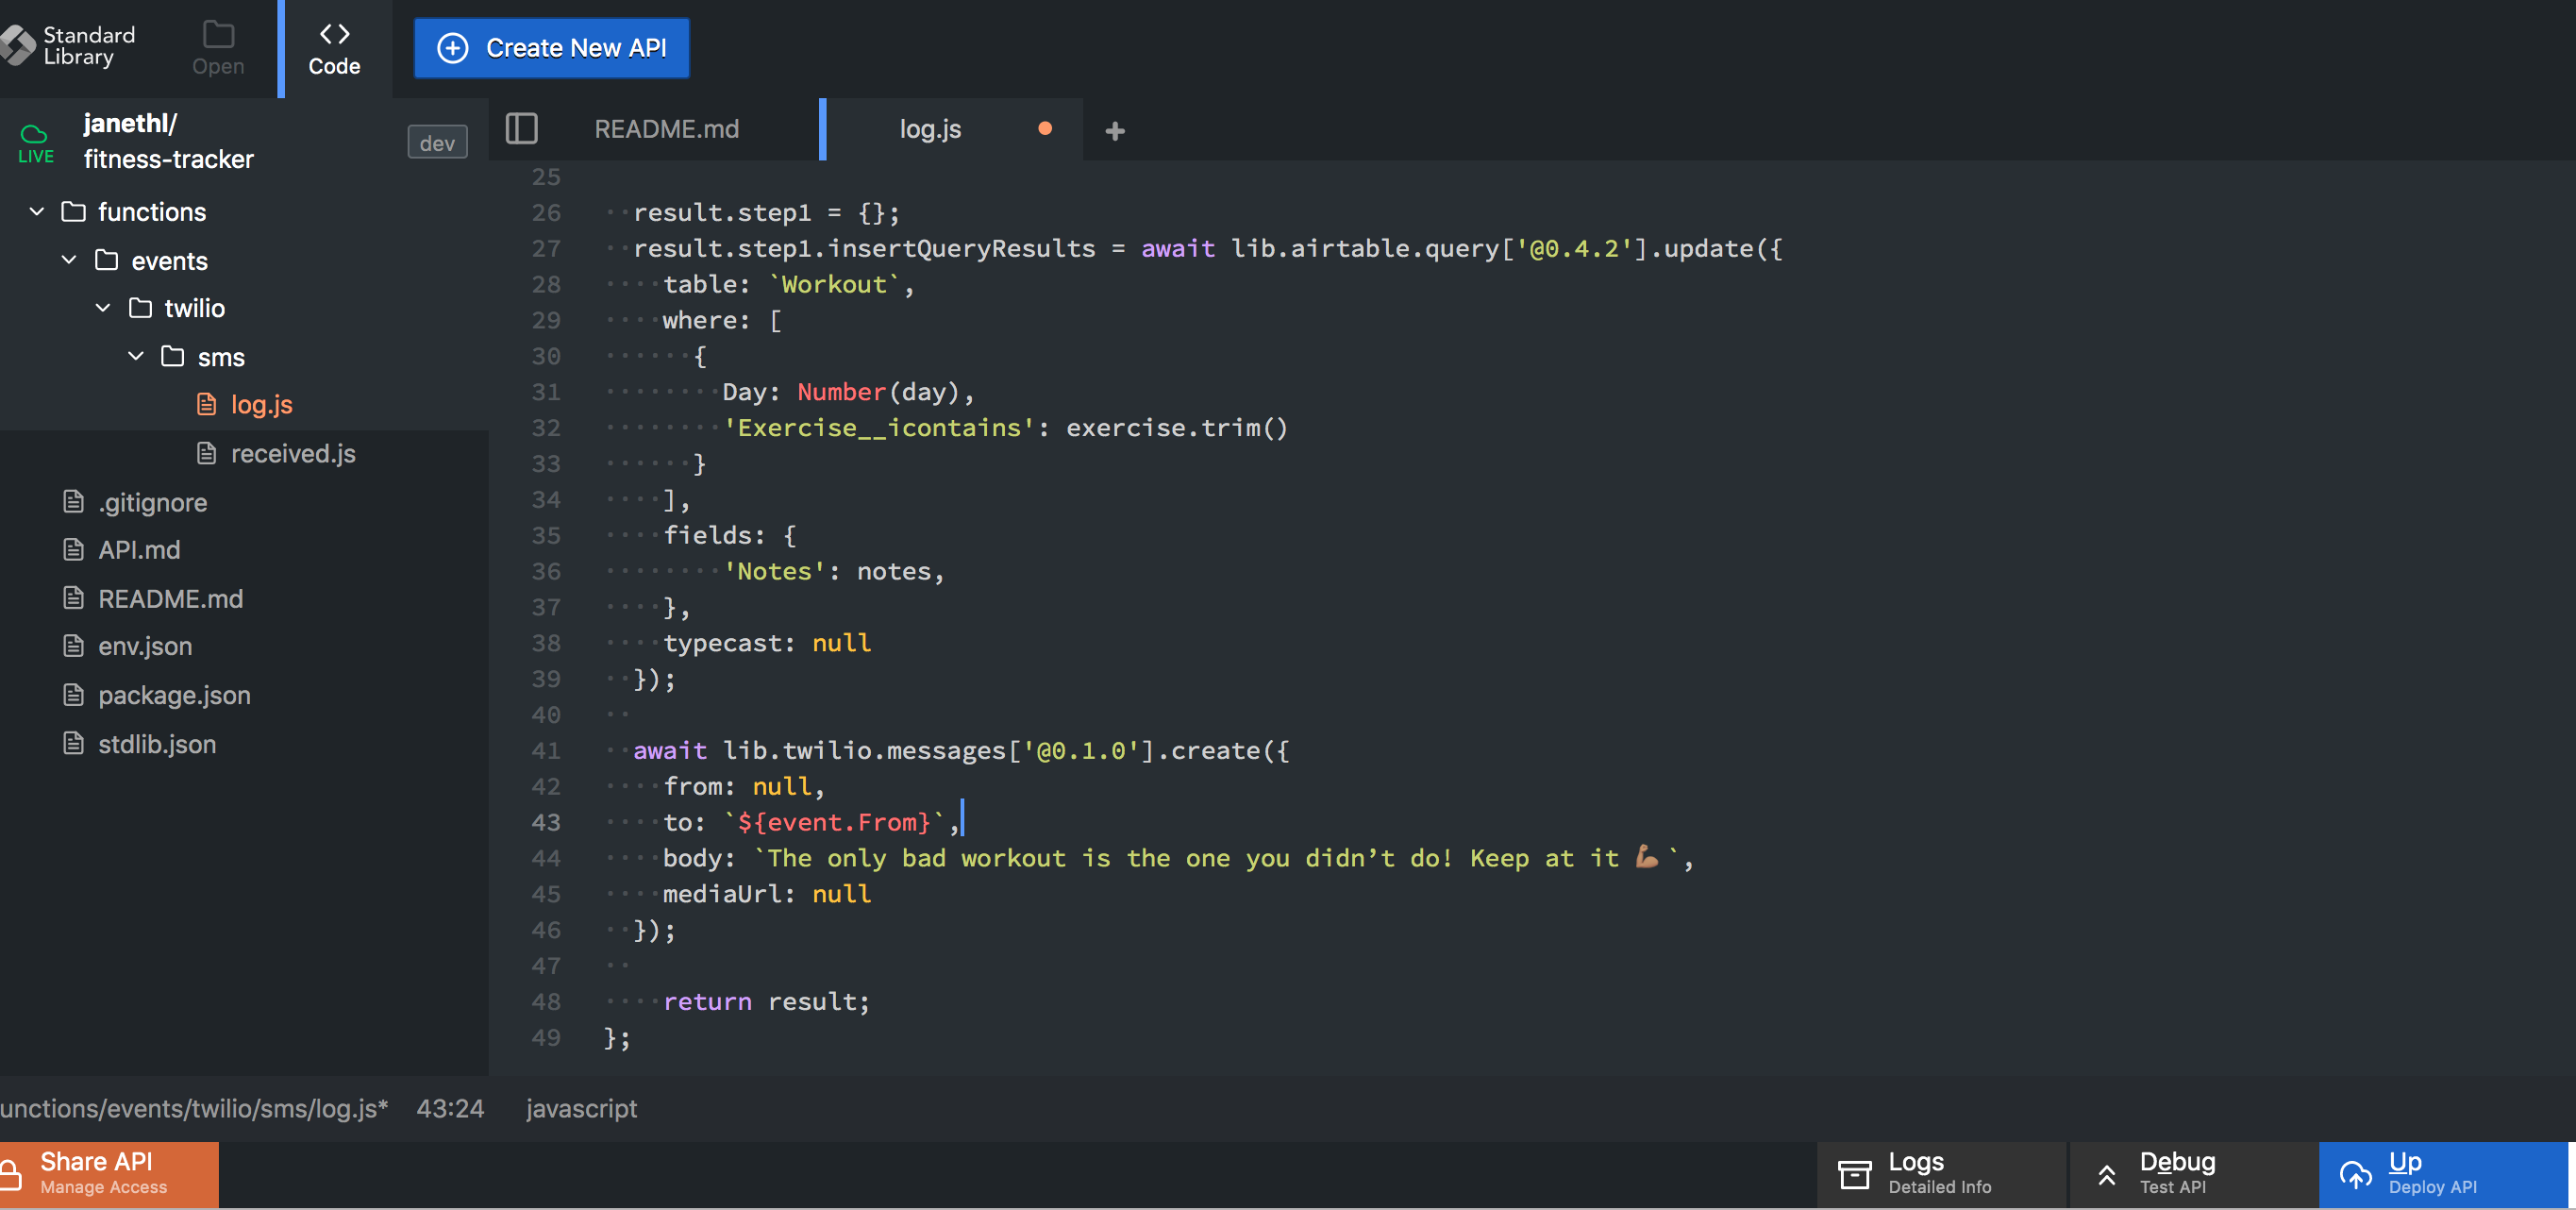
To modify the confirmation message that you receive when you log your workout open the log.js file underfunctions/events/twilio/sms folders. Change the body message on line 44 as I’ve done and hit the blue “Up” button to deploy your code again.
If you log a workout, you should receive the updated confirmation message!
That’s it! 🤗
Thank you for taking the time to read and try this out! If you found this tutorial helpful please let me know!

.png)
